The Essential Natural Lighting Photography Guide
Getting natural lighting photography down to a science is key to elevating your photography skills from amateur to professional. Natural lighting photography is a place where we all start, so mastering it is a must. This photography style can be utilised both in the studio and in breathtaking outdoor settings for stunning results.
This guide is ready to help discover effective and practical ways to make natural lighting photography work for you during different lighting scenarios and times of day, and also how to edit your photos to optimise and make your photos pop!
First, Why Natural Light?
It is everywhere. Getting to know and mastering different lighting settings is one of the best ways to strengthen your portfolio. Mastery of this part of the craft is difficult but imperative. Natural lighting can determine the mood of a photograph in ways that artificial lighting cannot. For instance, the warm lighting of golden hour (around 4-6pm) gives the photos a comforting aura. Photos shot in an overcast setting will give a more dreary, or tense, atmosphere that is very difficult to recreate in post-production alone. In short, we shoot in natural light situations for authenticity.
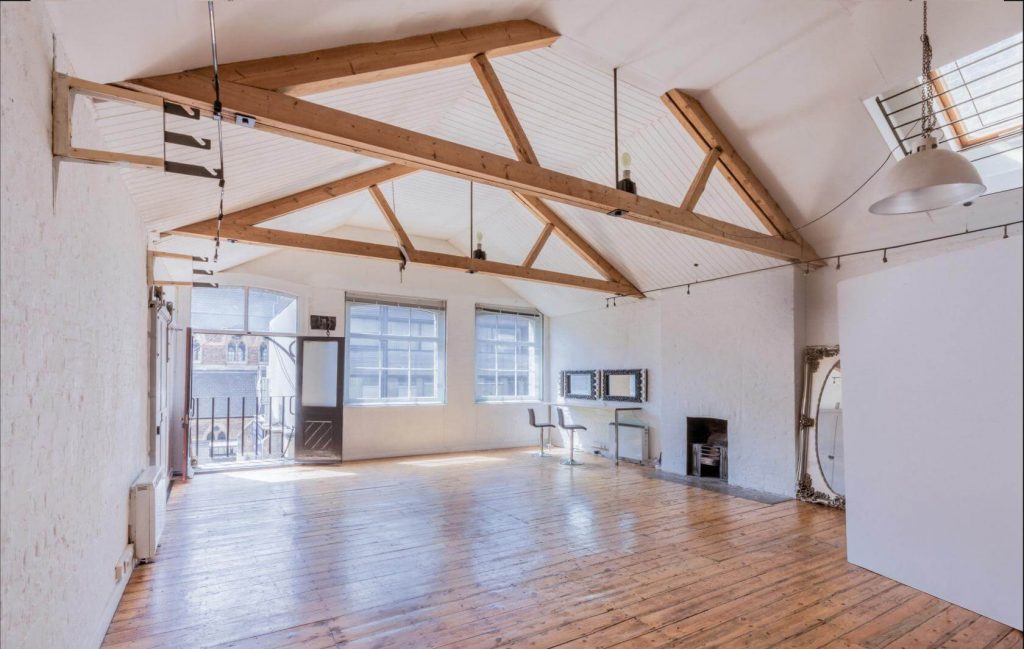
Natural Light Photo Studios
There are studios that allow in natural light through beautiful window arrangements. These studios combine the ability to control your environment as you can in every studio, but with the added benefit of being able to utilise natural light as you see fit. The natural light sources can either be the centrepiece part of your set or can compliment your studio lights. If you are looking to expand the scope of your talent, Tagvenue offers some of the best natural lighting studios around the world!
Lighting Scenarios
The first step of understanding natural light photography is to know the times of day to shoot. The time of day you choose for shooting depends on the needs of your client or project. Here are a few different lighting scenarios that you should be aware of and master:
Midday
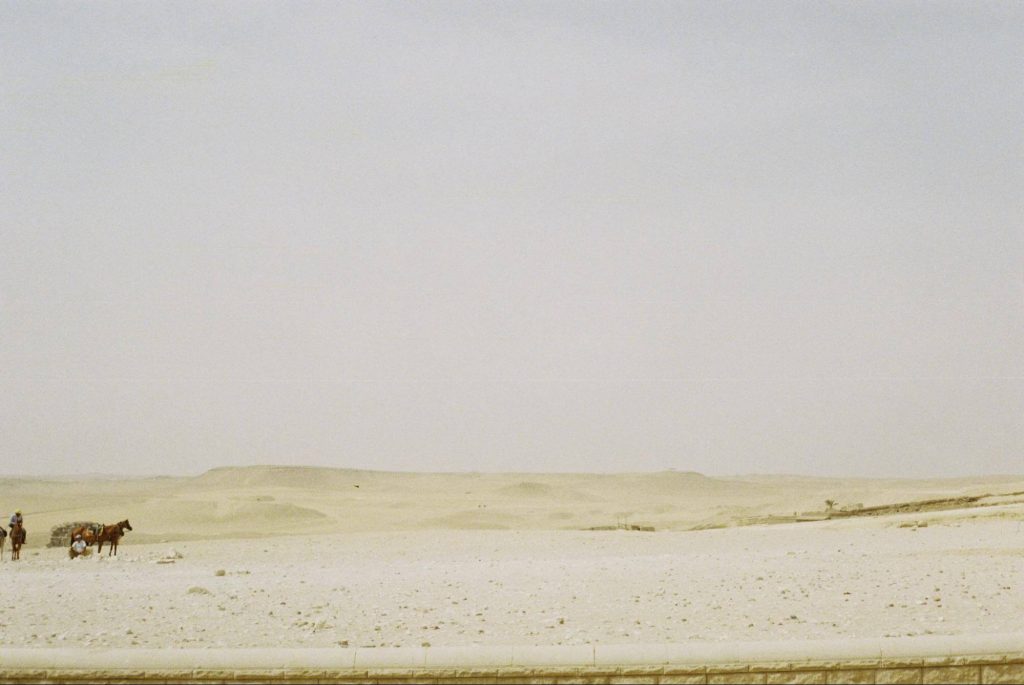
Typically when the sun is at its highest point. This is one of the more difficult times of day to shoot, but it is the perfect time to get stunning high-contrast photos. Be sure to utilise shadows in your shoot, and be aware of your exposure settings so your pictures do not wind up overexposed, which is impossible to edit out. Getting midday shooting right takes time, but when you nail it, you’ll know.
Golden Hour
This occurs twice a day at sunrise and sunset. This time, as the name implies, is the warmest time of day to shoot, and it offers beautiful, soft, amber light that makes your subjects look amazing. You can use mirrors to redirect the light at this time of day to create interesting ways to illuminate your subject, but this light looks great on its own!

Blue Hour
Blue hour is just before dawn and just after dusk. This is when the sun is below the horizon, giving the sky an incredibly luxurious blue hue. This is great for low light photography and you can implement contrasting lights like fluorescent bulbs and speedlights for a unique lighting setup.
Shooting outside is unpredictable. The weather can change quickly, clouds can block the sun, your subjects can get too hot or too cold. To shoot outside, you have to be aware of how to deal with different lighting situations, of course, but also have plans in place to make sure that when the conditions of your shoot change, that you are prepared.
Always keep up to date with the weather and discuss potential backup plans and rain dates with clients. Have snacks and water on standby, especially if the shoot will be going on for a few hours. These precautions are not only for the clients, but also to keep yourself sharp and find new and fun shots and cool ways to play with the light. Check out our other photography tips for some more insights on gear and organising photo shoots!
How to Use Different Lighting Scenarios
Your choice of different lighting scenarios will , of course, depend on the shoot you are doing and what your clients are expecting. Knowing different ways to use lighting scenarios is key for consulting clients as to what would work best with their photo shoot. Here are a few cool ways to use natural light and the positioning of the sun to help get great shots!
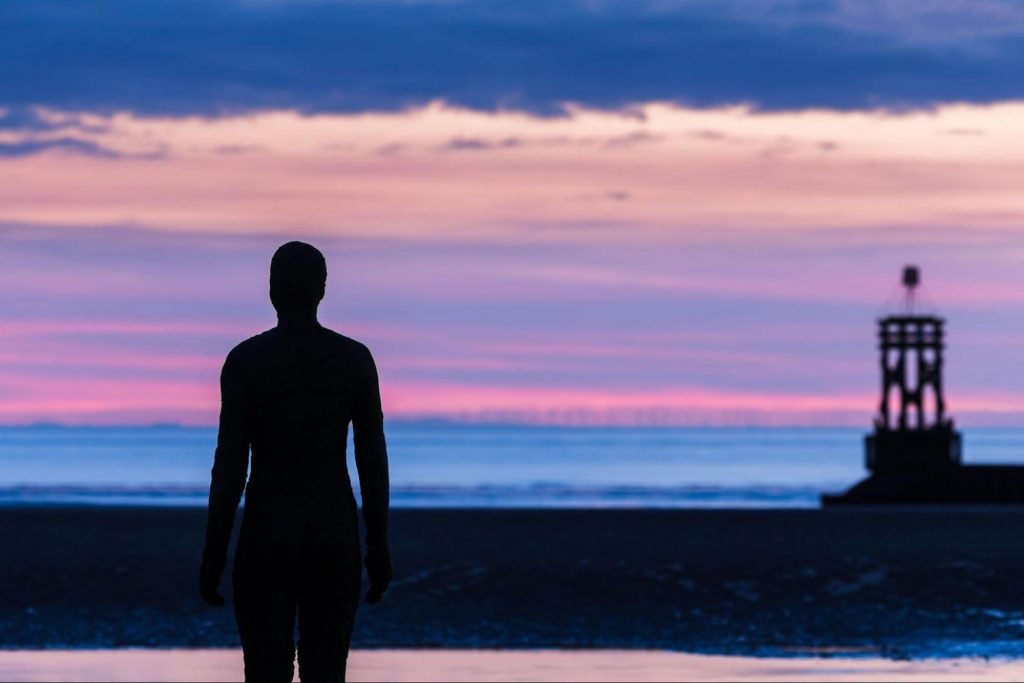
Backlighting
These are used to create a silhouetted effect. Backlit photos create a dramatic and mysterious atmosphere to your photos, and it is a breeze to make it work for you. This shot is best used around golden hour when the sun is at its lowest before dipping below the horizon.
Front Lighting
Light on the front of your subject creates a no frills image with minimal shadows where what you’re photographing takes centrestage. To avoid images coming off as flat, adjust the lighting with mirrors and play with some new angles.
Soft Lighting
This comes naturally to outdoor and natural light photography. As the sun rises and sets, this is when the sun’s light is the softest, as opposed to the harshness of midday shooting. This is one of the most forgiving situations to shoot in and is fun and easy to edit.
Hybrid Lighting
Using both natural and artificial light sources for your shoot can create a different effect. This is most common in indoor studios with large windows. You are able to control the amount of natural light entering the studio, and with the studio’s electrical infrastructure, you are able to run as many artificial lights as you want. If you are shooting outside, don’t forget about battery powered handheld LED lamps, floodlights, and speedlights of course. Hybrid lighting is best used in dimly lit situations, because if you were to use it during midday, you would risk overexposure.
You may also like: Photography Tips and Tricks for Beginners
Editing
Editing is the most important part of creating your own unique brand of photography. Learning to edit naturally lit shots is important for anyone’s portfolio, as these are ways to expand your craft into new and lucrative endeavours such as wedding photography, which is a culmination of outside and inside shots, and requires a certain level of competence and mastery that can only be achieved through practice.
Software
The industry standard software for editing is Adobe Lightroom. Mastering Lightroom is a bit challenging at first, but once you get the hang of it, you will see your photographs increase in quality exponentially. Lightroom is great for fine tuning, colour grading, and you can also make presets for the various lighting situations and moods you will encounter in the field. Having more than one screen is a great idea as well, so you can be sure that your images will be consistent over desktop, laptops, and mobile devices.
How to Edit in Harsh Light
You are going to have to shoot in the harsh light of midday from time to time. It is best to underexpose your shots and add the proper amount of exposure in post-production. An underexposed shot is a lot easier to adjust than an overexposed shot. Always pay attention to your histogram for the best results.
Psst! Don’t forget to check out: 8 Things You Need To Know to Make a Photo Shoot Plan
Golden and Blue Hours
When editing photos shot at these times, less is more. These shots usually require minimal editing: just fixing your histogram, adjusting exposure and contrast, making certain colours pop, and your darks darker and lights lighter. The light in these situations is usually beautiful and requires just a few touch ups.
Now Go Outside and Get Those Shots
Shooting in natural light is a necessary skill for every serious photographer to master. Once you start shooting outside, you will realise that these are some of the easiest and most fun shots to practice and experiment with. Once you know your lighting situations, get your gear in order, and know how to edit, you are good to go! Whether you want to bring your talent to a natural lit studio, a wedding, or a luscious garden, Tagvenue can help guide you through your next shoot and also put you in an amazing venue for the best results.
FAQ
What is the best natural lighting for photography?
The best natural lighting you can ask for in photography is golden hour. These shots require little editing and you can play around with the positioning of the sun from shot to shot. However, if you are looking for high-contrasting photos, midday harsh lighting would be the perfect scenario for you.
What are the disadvantages of natural light?
Firstly, natural lighting is unpredictable, especially on shoot days. You lack the control that you normally have during a studio shoot with artificial lights. If you are not aware of the intensity of light, you risk overexposure, which will essentially ruin your photos, making them extremely difficult, if not impossible to edit effectively.
How can photographers replicate natural light in a studio?
Natural light is incredibly difficult to replicate, but there are certain ways one can emulate the warmth of golden hour in a studio setting. Light filters are a good place to start. If you find one that is a more toned down orange or yellow over a fluorescent light, that will create a warm hue. You could also use a household lamp and put a pillowcase or sheet over it to diffuse and soften the light. You can also add warmth in post-production, but adding too much will make your photos look overprocessed.
Related articles
See all